Building a blog with Svelte: Adding Markdown
11/25/2020
I started building a personal blog with Svelte a few weeks ago, cross posting to dev.to for more reach and community.
And it sucks!
I've been manually building content with Svelte components, to get the look and feel I want on my site. And then I have to translate those posts into Markdown for posting elsewhere.
So I'm going to build Markdown support for my Svelte site, starting with this post. I'll tell you how I'm doing it if you want to add support to your Svelte site, and I'll compare the output on both platforms when I'm done!
Adding markdown-it
The first thing we need to do is add a library for Markdown parsing. I'm going to use markdown-it. It's seeing active development and the README has examples of rendering markdown in code, which will definitely help!
Step 1: Installing dependencies
markdown-it is an easy install via npm, but it does assume that you have a full node environment to fall back on. So we need to install a few extra dependencies.
npm install --save markdown-it punycode
npm install --save-dev @rollup/plugin-json
Step 2: Updating rollup.config.js
With dependencies installed, we can import the library into our Svelte app and try rendering basic Markdown. But rollup is going to complain because it can't import JSON, and it needs to be configured to support adding punycode into the browser bundle.
So let's fix that now.
To support JSON, we just need to add a rollup plugin (@rollup/plugin-json) with its default settings:
// In imports:
import json from '@rollup/plugin-json';

// In rollup config:
export default {
	//...
	plugins: [
		//...
		json()
		//...
	]
};
And we also need to tell rollup to include our punycode package into our browser bundle:
// In plugins:
resolve({
    browser: true,
    dedupe: ['svelte'],
    // Include our installed package, instead of the built in version
    preferBuiltins: false,
}),
Step 3: Rendering some sample Markdown
With those config updates, we should now be able to render Markdown inside of our Svelte app. So let's build a Markdown component to render that content!
We'll take in our Markdown string as a prop (markdown) for now. That lets us test with a static string, and we can update the app to read Markdown from files or a CMS in the future.
And we need to use Svelte's @html feature to add our generated HTML to the page.
⚠️ Warning: Using @html with user submitted content could expose your users to an XSS vulnerability. markdown-it has documentation about its security features and recommendations, which you should read and understand if you need to support user submitted content. ⚠️
<!-- src/Markdown.svelte -->
<script>
	import MarkdownIt from 'markdown-it';

	export let markdown = '';

	// Initialize `markdown-it`
	const md = new MarkdownIt();

	// Render to an html string
	const rendered = md.render(markdown);
</script>

<!-- Render with the `@html` directive -->
<div>
	{@html rendered}
</div>
And we'll need to add our Markdown component to test:
<script>
	import Markdown from './Markdown.svelte';
</script>

<Markdown markdown="# Hello from Markdown!" />
Reading Markdown from a file
Now that we can render Markdown, we're going to set up our build to read Markdown from files. Authoring is much easier in separate files, and this lets me use my project's git repo for some basic versioning.
Step 4: Importing *.md
Our Markdown components renders content from a string, so we need to be able to read our Markdown content in that format. rollup will fail right now if we try to import an .md file, but we can fix that with another plugin: rollup-plugin-string.
npm install --save-dev rollup-plugin-string
And when we add it to rollup.config.js, we need to configure it to read .md files:
// In imports:
import { string } from 'rollup-plugin-string';

// In rollup config:
export default {
	//...
	plugins: [
		//...
		string({
			include: ['**/*.md']
		})
		//...
	]
};
Step 5: Updating our test to render from a file
First, let's create a new Markdown file to test, src/example.md:
# Hello from Markdown!

We can render _text_.
And now import that markdown into your app:
<script>
	import Markdown from './Markdown.svelte';
	import exampleMarkdown from './example.md';
</script>

<Markdown markdown={exampleMarkdown} />
Supporting syntax highlighting
Basic Markdown is great, but one of the killer features for blogging as an engineer is syntax highlighting. markdown-it supports highlighting via a library, so let's add that now.
Step 6: Install highlight.js
highlight.js will allow us to add syntax highlighting to a wide variety of languages (including Markdown 🤣), and is bundled with a wide variety of themes we can use. And markdown-it uses it in their example, so let's start there.
npm install --save highlight.js
We don't need to update our rollup config for this step, but we will need to configure highlighting in our Markdown component:
<!-- src/Markdown.svelte -->
<script>
	import MarkdownIt from 'markdown-it';

	// NEW: Import `highlight.js`
	import hljs from 'highlight.js';

	export let markdown = '';

	// Initialize `markdown-it`
	// NEW: Configure highlight via constructor params!
	const md = new MarkdownIt({
		highlight: function (str, lang) {
			if (lang && hljs.getLanguage(lang)) {
				try {
					return hljs.highlight(lang, str).value;
				} catch (e) {
					// eslint-disable-next-line no-console
					console.error('Failed to highlight string');
				}
			}
			return ''; // use external default escaping
		}
	});

	// Render to an html string
	const rendered = md.render(markdown);
</script>

<!-- Render with the `@html` directive -->
<div>
	{@html rendered}
</div>
Step 7: Import highlight.js themes
Adding a code block to the example markdown will render a code block, but we're not currently getting any styling for our highlighting. We can import styles directly from highlight.js styles, but we'll need to update our rollup config again for this to work.
    ```javascript
    console.log('and we can highlight code')
    ```
We're going to add rollup-plugin-styles to handle our CSS imports.
npm install --save-dev rollup-plugin-styles
And we can use its default configuration in rollup.config.js.
// In imports:
import styles from 'rollup-plugin-styles';

// In rollup config:
export default {
	//...
	plugins: [
		//...
		styles()
		//...
	]
};
Once we've done that, we can import a stylesheet from highlight.js into our Markdown component to render those styles into our site. I'm going to use a11y-light for this example, but there are lots of options you can pick, depending on your site's color scheme.
<!-- src/Markdown.svelte -->
<script>
  import MarkdownIt from 'markdown-it'
  import 'highlight.js/styles/a11y-light.css'
  // ...
Wrapping up and writing the post!
With all of these pieces in place, I can now write this blog post in Markdown! There is still some work to do, especially styling the rendered HTML to match the rest of my site. But I can create my content in Markdown and let these libraries worry about the HTML!
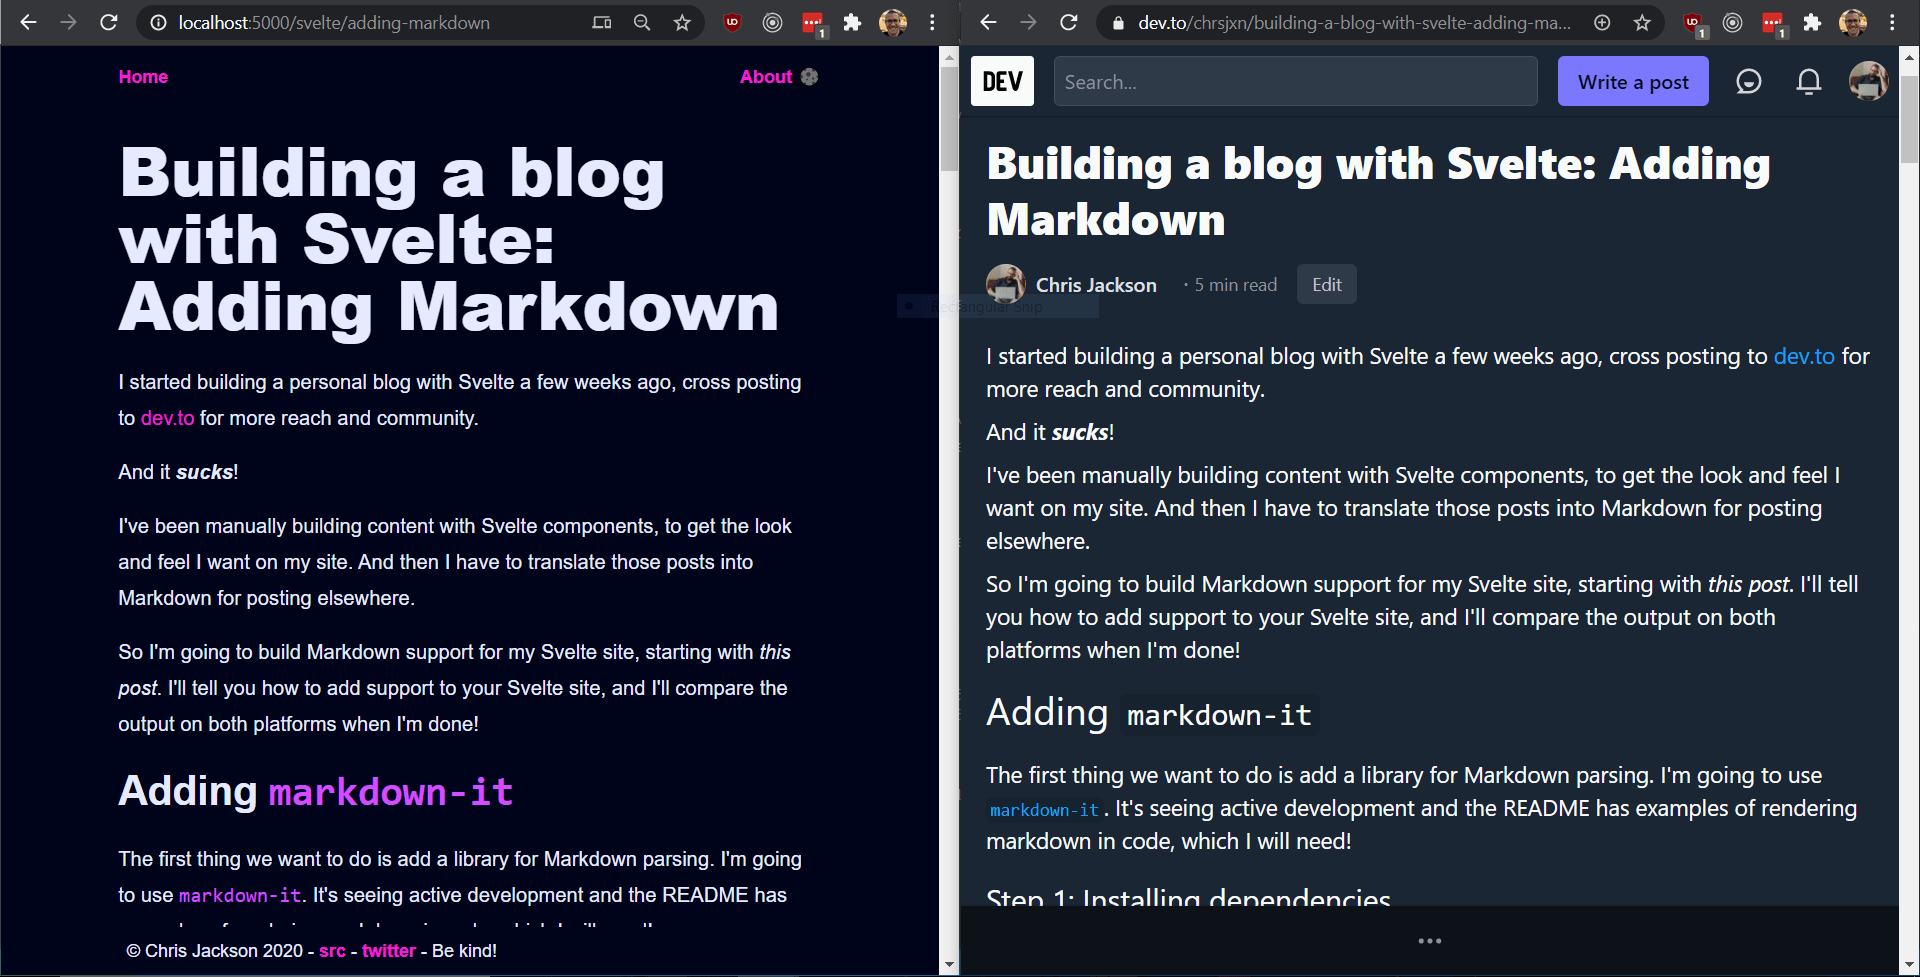
For a quick demo, here's a comparison of the markdown for this post rendered in my local development environment and in a draft post on dev.to:
If you want to see the final version of the rollup config, I have a completed copy of the tutorial posted on github!
If you have suggestions for improvements, I'm happy to chat on twitter!